LV05-02-线程-03-线程属性

本文主要是进程——线程属性的相关笔记,若笔记中有错误或者不合适的地方,欢迎批评指正😃。

点击查看使用工具及版本
Windows windows11
Ubuntu Ubuntu16.04的64位版本
VMware® Workstation 16 Pro 16.2.3 build-19376536
SecureCRT Version 8.7.2 (x64 build 2214) - 正式版-2020年5月14日
开发板 正点原子 i.MX6ULL Linux阿尔法开发板
uboot NXP官方提供的uboot,NXP提供的版本为uboot-imx-rel_imx_4.1.15_2.1.0_ga(使用的uboot版本为U-Boot 2016.03)
linux内核 linux-4.15(NXP官方提供)
STM32开发板 正点原子战舰V3(STM32F103ZET6)
点击查看本文参考资料
参考方向 参考原文
------
点击查看相关文件下载
--- ---

前边学习线程创建函数的时候我们知道,在创建一个线程的时候我们是可以设置线程的相关属性的,那具体怎么操作呢?在 Linux 下,使用 pthread_attr_t 数据类型定义线程的所有属性,由于多数情况还是默认方式创建,所以这里只做简单的介绍,算是为后边线程分离属性的设置打一个基础吧。

一、线程属性对象的创建与销毁

1. pthread_attr_init()

1.1 函数说明

在 linux 下可以使用 man pthread_attr_init 命令查看该函数的帮助手册。

1
2
3
/* Compile and link with -pthread. */
#include <pthread.h>
int pthread_attr_init(pthread_attr_t *attr);

【函数说明】初始化线程的属性。

【函数参数】

  • attr : pthread_attr_t * 类型,指向需要进行初始化的线程属性对象。
点击查看 pthread_attr_t 成员

说实话,我没找到这个结构体的定义,下边的在网上搜到的,应该是都差不多,后边找到的话再补充把。

1
2
3
4
5
6
7
8
9
10
11
12
typedef struct
{
int detachstate; /* 线程的分离状态 */
int schedpolicy; /* 线程调度策略 */
struct sched_param schedparam; /* 线程的调度参数 */
int inheritsched; /* 线程的继承性 */
int scope; /* 线程的作用域 */
size_t guardsize; /* 线程栈末尾的警戒缓冲区大小 */
int stackaddr_set; /* 线程堆栈设置 */
void * stackaddr; /* 线程栈的位置 */
size_t stacksize; /* 线程栈的大小 */
} pthread_attr_t;

【返回值】 int 类型,成功返回 0 ,失败将返回错误码。

【使用格式】一般情况下基本使用格式如下:

1
2
3
4
5
6
/* 需要包含的头文件 */
#include <pthread.h>

/* 至少应该有的语句 */
pthread_attr_t attr;
pthread_attr_init(&attr);

【注意事项】 Linux 为 pthread_attr_t 对象的每种属性提供了设置属性的接口以及获取属性的接口,所以我们可以不用关心 pthread_attr_t 结构体内部成员的具体情况。

1.2 使用实例

在后边的实例中会有说明。

2. pthread_attr_destroy()

2.1 函数说明

在 linux 下可以使用 man pthread_attr_destroy 命令查看该函数的帮助手册。

1
2
3
/* Compile and link with -pthread. */
#include <pthread.h>
int pthread_attr_destroy(pthread_attr_t *attr);

【函数说明】该函数销毁一个线程属性对象。

【函数参数】

  • attr : pthread_attr_t * 类型,指向已经进行过初始化的线程属性对象。

【返回值】 int 类型,成功返回 0 ,失败将返回错误码。

【使用格式】一般情况下基本使用格式如下:

1
2
3
4
5
6
/* 需要包含的头文件 */
#include <pthread.h>

/* 至少应该有的语句 */
pthread_attr_t attr;
pthread_attr_destroy(&attr);

【注意事项】当不再需要一个线程属性对象时,应该使用 pthread_attr_destroy() 函数销毁它,销毁线程属性对象对使用该对象创建的线程没有影响。

2.2 使用实例

后边的实例中会有说明。

二、线程栈的属性

每个线程都有自己的栈空间, pthread_attr_t 数据结构中定义了栈的起始地址以及栈大小,调用函数 pthread_attr_getstack() 可以获取这些信息,函数 pthread_attr_setstack() 对栈起始地址和栈大小进行设置。

1. pthread_attr_getstack()

1.1 函数说明

在 linux 下可以使用 man pthread_attr_getstack 命令查看该函数的帮助手册。

1
2
3
/* Compile and link with -pthread. */
#include <pthread.h>
int pthread_attr_getstack(const pthread_attr_t *attr, void **stackaddr, size_t *stacksize);

【函数说明】该函数获取线程创建栈属性 stackaddr 和 stacksize 。

【函数参数】

  • attr : const pthread_attr_t * 类型,参数 attr 指向线程属性对象。

  • stackaddr : void ** 类型,是一个二级指针类型,获取的栈的起始地址信息保存在 *stackaddr 中。

  • stacksize : size_t * 类型,获取的栈大小信息保存在参数 stacksize 所指向的内存中。

【返回值】 int 类型,成功返回 0 ,失败将返回错误码。

【使用格式】 none

【注意事项】 stackaddr 和 stacksize 描述的堆栈内的所有页面都应该是线程可读写的。

1.2 使用实例

后边的实例会有说明。

2. pthread_attr_setstack()

2.1 函数说明

在 linux 下可以使用 man pthread_attr_setstack 命令查看该函数的帮助手册。

1
2
3
/* Compile and link with -pthread. */
#include <pthread.h>
int pthread_attr_setstack(pthread_attr_t *attr, void *stackaddr, size_t stacksize);

【函数说明】该函数设置线程创建栈属性 stackaddr 和 stacksize 。

【函数参数】

  • attr : const pthread_attr_t * 类型,参数 attr 指向线程属性对象。

  • stackaddr : void * 类型,设置栈起始地址为指定值。

  • stacksize : size_t * 类型,:设置栈大小为指定值。

【返回值】 int 类型,成功返回 0 ,失败将返回错误码。

【使用格式】 none

【注意事项】 stackaddr 和 stacksize 描述的堆栈内的所有页面都应该是线程可读写的。

2.2 使用实例

后边的实例会有说明。

三、线程分离属性

1. pthread_attr_setdetachstate()

1.1 函数说明

在 linux 下可以使用 man pthread_attr_setdetachstate 命令查看该函数的帮助手册。

1
2
3
/* Compile and link with -pthread. */
#include <pthread.h>
int pthread_attr_setdetachstate(pthread_attr_t *attr, int detachstate);

【函数说明】该函数设置 detachstate 线程属性(线程的分离状态属性)。

【函数参数】

  • attr : const pthread_attr_t * 类型,参数 attr 指向线程属性对象。
  • detachstate : int 类型, attr 中线程分离状态属性设置为 detachstate 的值。
点击查看 detachstate 取值情况
PTHREAD_CREATE_DETACHED新建线程一开始运行便处于分离状态,以分离状态启动线程,无法被其它线程调用pthread_join()回收,线程结束后由操作系统收回其所占用的资源
PTHREAD_CREATE_JOINABLE这是detachstate线程属性的默认值,正常启动线程,可以被其它线程获取终止状态信息

【返回值】 int 类型,成功返回 0 ,失败将返回错误码。

【使用格式】

1
2
3
4
5
6
7
/* 需要包含的头文件 */
#include <pthread.h>

/* 至少应该有的语句 */
pthread_attr_t attr;
pthread_attr_init(&attr);
pthread_attr_setdetachstate(&attr, PTHREAD_CREATE_DETACHED);

【注意事项】如果设置一个线程为分离线程,而这个线程运行又非常快,它很可能在 pthread_create 函数返回之前就终止了,它终止以后就可能将线程号和系统资源移交给其他的线程使用,这样调用 pthread_create 的线程就得到了错误的线程号。要避免这种情况可以采取一定的同步措施。(暂时未遇到,后边遇到了再补充)

1.2 使用实例

点击查看实例
test.c
1
2
3
4
5
6
7
8
9
10
11
12
13
14
15
16
17
18
19
20
21
22
23
24
25
26
27
28
29
30
31
32
33
34
35
36
37
38
39
#include <stdio.h>
#include <pthread.h>/* pthread_create pthread_exit pthread_self pthread_join pthread_detach*/
#include <unistd.h> /* sleep */
#include <string.h> /* strerror */

void *threadDetach(void *arg);

int main(int argc, char *argv[])
{
int ret;
pthread_t tid;

/* 0. 设置线程分离属性 */
pthread_attr_t attr;
pthread_attr_init(&attr);/* 对attr对象进行初始化 */
pthread_attr_setdetachstate(&attr,PTHREAD_CREATE_DETACHED);/* 设置以分离状态启动线程 */


/* 1. 创建一个线程 */
ret = pthread_create(&tid, &attr, threadDetach, NULL);
printf("This is main thread,ret=%d,tid=%lu\n", ret, tid);

/* 2. 主线程分离子线程或者在子线程中分离自己 */
sleep(1);
/* 3. 分离后进行回收,若分离成功,则会出错 */
ret = pthread_join(tid, NULL);
if(ret != 0)
printf("pthread_join error: %s\n", strerror(ret));
sleep(1);
return 0;
}

void *threadDetach(void *arg)
{
printf("This is a thread test! pid=%d,tid=%lu\n", getpid(), pthread_self());

sleep(1);
pthread_exit("thread return!");
}

在终端执行以下命令编译程序:

1
2
gcc test.c -Wall -l pthread # 生成可执行文件 a.out 
./a.out # 执行可执行程序

然后,终端会有以下信息显示:

1
2
3
This is main thread,ret=0,tid=139921936299584
This is a thread test! pid=8340,tid=139921936299584
pthread_join error: Invalid argument

2. pthread_attr_getdetachstate()

2.1 函数说明 

在 linux 下可以使用 man pthread_attr_getdetachstate 命令查看该函数的帮助手册。

1
2
3
/* Compile and link with -pthread. */
#include <pthread.h>
int pthread_attr_getdetachstate(const pthread_attr_t *attr, int *detachstate);

【函数说明】该函数获取线程创建线程的线程分离状态属性。

【函数参数】

  • attr : const pthread_attr_t * 类型,参数 attr 指向线程属性对象。

  • detachstate : int * 类型,获取 attr 中线程分离状态属性,并保存在 detachstate 的所指向的内存空间中。

【返回值】 int 类型,成功返回 0 ,失败将返回错误码。

【使用格式】 none

【注意事项】 none

2.2 使用实例

这个没咋用过,就了解一下吧。

四、线程优先级属性

1. 线程优先级

在linux系统中,我们创建的线程时是可以为其指定优先级和调度策略的。在linux系统中的线程分为实时线程和非实时线程,一般创建的线程默认为非实时线程。所有优先级值在0-99范围内的,都是实时进程,所以这个优先级范围也可以叫做实时进程优先级,而100-139范围内的是非实时进程。

实时线程分99个静态优先级,数字越大,优先级越高。在实时线程当中支持抢占调度策略跟轮询调度策略,拥有抢占所有实时线程运行资源的能力,必须拥有超级用户权限才能够运行。

对于非实时线程,单位时间中,并没有在乎响应能力的一个线程,里面只有一个静态优先级0,也就是在非实时线程中,它是没有静态优先级的概念的,它的所有的执行过程都是由系统自动分配的。非实时线程只有一个静态优先级,所以同时非实时线程的任务无法抢占他人的资源,在非实时线程当中只支持其他调度策略 (自动适配的,系统分配的调度策略)不拥有抢占所有运行资源的能力。支持动态优先级系统自适应,从-20到19的动态优先级 (nice值)。

2. 三种调度策略

  • 抢占式调度策略,

在同一静态优先级的情况下,抢占调度策略的线程一旦运行,便会一直抢占CPU资源,而其他同一优先级的只能一直等到这个抢占式调度策略的线程退出才能被运行到(这个时候的非实时线程会有一小部分资源分配到)。也就是说这种调度策略的线程是先到先服务,一旦占用cpu则一直运行,一直运行直到有更高优先级任务到达或自己放弃。

  • 轮询式调度策略

在同一静态优先级的情况下,所有线程合理瓜分时间片,不会一直抢占CPU资源(这个时候的非实时线程会有一小部分资源分配到)。这个其实就是时间片轮转。当进程的时间片用完,系统将重新分配时间片,并置于就绪队列尾。放在队列尾保证了所有具有相同优先级的RR任务的调度公平

在网上查了一下,时间片长度为100ms,这个倒是有待查证,感觉不会这么长,后边确认了再更新。

点击查看时间片

内核在微观上,把CPU的运行时间分成许多分,然后安排给各个进程轮流运行,造成宏观上所有的进程仿佛同时在执行,但实际上对于单核CPU来说,同一时刻只会有一个进程运行,线程也是一样。对于双核CPU,实际上最多只能有两个进程在同时运行,另外我们在 top、vmstat 命令里看到的正在运行的进程,并不是真的在占有着CPU。

  • 其他普通式调度策略(分时调度策略)

只能作用于非实时线程,由系统自动分配时间片,并目根据运行状态自动分配动态优先级。

注意抢占式调度策略和轮询式调度策略只能在实时线程中被设置,也就是静态优先级1-99的区域内设置,普通非实时线程不能设置。

3. 调度策略相关函数

3.1 pthread_attr_setschedpolicy()

3.1.1 函数说明

在 linux 下可以使用 man pthread_attr_setschedpolicy 命令查看该函数的帮助手册。

1
2
3
4
5
6
7
// Compile and link with -pthread.

/* 需包含的头文件 */
#include <pthread.h>

/* 函数声明 */
int pthread_attr_setschedpolicy(pthread_attr_t *attr, int policy);

【函数说明】该函数用于设置线程的调度策略到线程属性变量中(创建线程时使用)。

【函数参数】

  • attr: pthread_attr_t 类型指针变量,表示线程属性结构体地址。
  • policy:int 类型变量,表示调度策略,一共有两种,非实时调度策略(SCHED_OTHER)和实时调度策略(SCHED_FIFO, SCHED_RR,其中SCHED_FIFO表示抢占式调度,SCHED_RR是轮询式调度)。

【返回值】 int 类型,成功返回0,失败返回一个错误值。

【使用格式】一般情况下基本使用格式如下:

1
2
3
4
5
6
7
/* 需要包含的头文件 */
#include <pthread.h>

/* 至少应该有的语句 */
pthread_attr_t attr;
pthread_attr_init(&attr);
pthread_attr_setschedpolicy(&attr, SCHED_RR);

【注意事项】

(1) 一般来说,系统创建线程时,默认的线程都是SCHED_OTHER策略。

(2)为了让pthread_attr_setschedpolicy()在调用pthread_create(创建线程)时生效,调用者必须使用pthread_attr_setinheritsched()将属性对象attr的继承调度器属性设置为PTHREAD_EXPLICIT_SCHED。

3.1.2 使用实例

后边会有一个综合测试的实例。

3.2 pthread_attr_getschedpolicy()

3.2.1 函数说明

在 linux 下可以使用 man pthread_attr_getschedpolicy 命令查看该函数的帮助手册。

1
2
3
4
5
6
7
// Compile and link with -pthread.

/* 需包含的头文件 */
#include <pthread.h>

/* 函数声明 */
int pthread_attr_getschedpolicy(const pthread_attr_t *attr, int *policy);

【函数说明】该函数用于获取线程的调度策略到线程属性变量中(创建线程时使用)。

【函数参数】

  • attr: pthread_attr_t 类型指针变量,表示线程属性结构体地址。
  • policy:int 类型指针变量,表示调度策略,一共有两种,非实时调度策略(SCHED_OTHER)和实时调度策略(SCHED_FIFO, SCHED_RR,其中SCHED_FIFO表示抢占式调度,SCHED_RR是轮询式调度)。

【返回值】 int 类型,成功返回0,失败返回一个错误值。

【使用格式】

1
2
3
4
5
6
7
8
/* 需要包含的头文件 */
#include <pthread.h>

/* 至少应该有的语句 */
pthread_attr_t attr;
int policy;
pthread_attr_init(&attr);
pthread_attr_setschedpolicy(&attr, &policy);

【注意事项】 一般来说,系统创建线程时,默认的线程都是SCHED_OTHER策略。

3.2.2 使用实例

后边会有一个综合测试的实例。

3.3 pthread_attr_setinheritsched()

3.3.1 pthread_attr_setinheritsched()

在 linux 下可以使用 man pthread_attr_setinheritsched命令查看该函数的帮助手册。

1
2
3
4
5
6
7
// Compile and link with -pthread.

/* 需包含的头文件 */
#include <pthread.h>

/* 函数声明 */
int pthread_attr_setinheritsched(pthread_attr_t *attr, int inheritsched);

【函数说明】该函数用于设置线程的调度策略继承属性到线程属性变量中(创建线程时使用)。一般创建的线程是默认继承父进程的调度策略的,我们再设置线程的优先级是不会生效的,要想使用我们自己设置的调度策略,必须使用此函数设置不继承父进程的调度策略。

【函数参数】

  • attr: pthread_attr_t 类型指针变量,表示线程属性结构体地址。
  • inheritsched:int 类型变量,表示线程的继承性,一共有两种,PTHREAD_INHERIT_SCHED:使用attr创建的线程从创建的线程继承调度属性,忽略attr中的调度属性;PTHREAD_EXPLICIT_SCHED:使用attr创建的线程从attributes对象指定的值中获取调度属性。在新初始化的线程属性对象中,继承调度器属性的默认设置是PTHREAD_INHERIT_SCHED。

【返回值】 int 类型,成功返回0,失败返回一个错误值。

【使用格式】一般情况下基本使用格式如下:

1
2
3
4
5
6
7
/* 需要包含的头文件 */
#include <pthread.h>

/* 至少应该有的语句 */
pthread_attr_t attr;
pthread_attr_init(&attr);
pthread_attr_setinheritsched(&attr, PTHREAD_EXPLICIT_SCHED);

【注意事项】

(1) 一般来说,在新初始化的线程属性对象中,继承调度器属性的默认设置是PTHREAD_INHERIT_SCHED。

(2)为了让pthread_attr_setschedpolicy()在调用pthread_create(创建线程)时生效,调用者必须使用pthread_attr_setinheritsched()将属性对象attr的继承调度器属性设置为PTHREAD_EXPLICIT_SCHED。

3.3.2 使用实例

后边会有一个综合测试的实例。

3.4 pthread_attr_getinheritsched()

4.3.4 pthread_attr_getinheritsched()

在 linux 下可以使用 man pthread_attr_getinheritsched命令查看该函数的帮助手册。

1
2
3
4
5
6
7
// Compile and link with -pthread.

/* 需包含的头文件 */
#include <pthread.h>

/* 函数声明 */
int pthread_attr_getinheritsched(const pthread_attr_t *attr, int *inheritsched);

【函数说明】该函数用于获取线程的调度策略继承属性到线程属性变量中(创建线程时使用)。

【函数参数】

  • attr: pthread_attr_t 类型指针变量,表示线程属性结构体地址。
  • inheritsched:int 类型指针变量,表示线程的继承性,一共有两种,PTHREAD_INHERIT_SCHED:使用attr创建的线程从创建的线程继承调度属性,忽略attr中的调度属性;PTHREAD_EXPLICIT_SCHED:使用attr创建的线程从attributes对象指定的值中获取调度属性。在新初始化的线程属性对象中,继承调度器属性的默认设置是PTHREAD_INHERIT_SCHED。

【返回值】 int 类型,成功返回0,失败返回一个错误值。

【使用格式】

1
2
3
4
5
6
7
8
/* 需要包含的头文件 */
#include <pthread.h>

/* 至少应该有的语句 */
pthread_attr_t attr;
int inheritsched;
pthread_attr_init(&attr);
pthread_attr_getinheritsched(&attr, &inheritsched);

【注意事项】 一般来说,在新初始化的线程属性对象中,继承调度器属性的默认设置是PTHREAD_INHERIT_SCHED。

3.3.2 使用实例

后边会有一个综合测试的实例。

3.5 pthread_setschedparam()

3.5.1 函数说明

在 linux 下可以使用 man pthread_setschedparam命令查看该函数的帮助手册。

1
2
3
4
5
6
7
// Compile and link with -pthread.

/* 需包含的头文件 */
#include <pthread.h>

/* 函数声明 */
int pthread_setschedparam(pthread_t thread, int policy, const struct sched_param *param);

【函数说明】该函数用于设置线程的调度策略和线程的优先级,前边是直接在初始化的时候,通过线程属性设置,这个函数可以在线程创建后,在线程内部设置线程的调度策略,它不受pthread_attr_setinheritsched()函数的影响,也就是说,即便初始化时没有设置不继承父进程调度策略,这里也会将线程配置为我们新设置的调度策略。

【函数参数】

  • thread : pthread_t 类型变量,表示线程ID,我们可以在线程内部使用pthread_self()函数获取线程ID。
  • policy :int 类型变量,表示调度策略,一共有两种,非实时调度策略(SCHED_OTHER)和实时调度策略(SCHED_FIFO, SCHED_RR,其中SCHED_FIFO表示抢占式调度,SCHED_RR是轮询式调度)。
  • param :struct sched_param 类型结构体指针变量,表示线程的优先级,它其实只有一个成员,就是sched_priority。
点击查看 struct sched_param 结构体成员
1
2
3
struct sched_param {
int sched_priority; /* Scheduling priority */
};

【返回值】 int 类型,成功返回0,失败返回一个错误值。

【使用格式】

1
2
3
4
5
6
7
8
/* 需要包含的头文件 */
#include <pthread.h>

/* 至少应该有的语句 */
int policy = SCHED_RR;
struct sched_param param;
param.sched_priority = 90;
pthread_setschedparam(pthread_self(), policy, &param);

【注意事项】 如果pthread_setschedparam()失败,线程的调度策略和参数不会改变。

3.5.2 使用实例

后边会有一个综合测试的实例。

3.6 pthread_getschedparam()

3.6.1 函数说明

在 linux 下可以使用 man pthread_getschedparam命令查看该函数的帮助手册。

1
2
3
4
5
6
7
// Compile and link with -pthread.

/* 需包含的头文件 */
#include <pthread.h>

/* 函数声明 */
int pthread_getschedparam(pthread_t thread, int *policy, struct sched_param *param);

【函数说明】该函数用于获取线程的调度策略继承属性和线程的优先级,在线程内部使用。

【函数参数】

  • thread : pthread_t 类型变量,表示线程ID,我们可以在线程内部使用pthread_self()函数获取线程ID。
  • policy :int 类型指针变量,表示调度策略,一共有两种,非实时调度策略(SCHED_OTHER)和实时调度策略(SCHED_FIFO, SCHED_RR,其中SCHED_FIFO表示抢占式调度,SCHED_RR是轮询式调度)。
  • param :struct sched_param 类型结构体指针变量,表示线程的优先级,它其实只有一个成员,就是sched_priority。

【返回值】 int 类型,成功返回0,失败返回一个错误值。

【使用格式】

1
2
3
4
5
6
7
/* 需要包含的头文件 */
#include <pthread.h>

/* 至少应该有的语句 */
int policy;
struct sched_param param;
pthread_getschedparam(pthread_self(), &policy, &param);

【注意事项】 none

3.6.2 使用实例

后边会有一个综合测试的实例。

3.7 pthread_attr_setschedparam()

3.7.1 函数说明

在 linux 下可以使用 man pthread_attr_setschedparam命令查看该函数的帮助手册。

1
2
3
4
5
6
7
// Compile and link with -pthread.

/* 需包含的头文件 */
#include <pthread.h>

/* 函数声明 */
int pthread_attr_setschedparam(pthread_attr_t *attr, const struct sched_param *param);

【函数说明】该函数用于设置的优先级到线程属性中(线程创建时使用)。

【函数参数】

  • attr: pthread_attr_t 类型指针变量,表示线程属性结构体地址。
  • param :struct sched_param 类型结构体指针变量,表示线程的优先级,它其实只有一个成员,就是sched_priority。
点击查看 struct sched_param 结构体成员
1
2
3
struct sched_param {
int sched_priority; /* Scheduling priority */
};

【返回值】 int 类型,成功返回0,失败返回一个错误值。

【使用格式】

1
2
3
4
5
6
7
8
9
10
/* 需要包含的头文件 */
#include <pthread.h>

/* 至少应该有的语句 */
pthread_attr_t attr;
pthread_attr_init(&attr);

struct sched_param param;
param.sched_priority = 90;
pthread_attr_setschedparam(&attr, &param);

【注意事项】 none

3.7.2 使用实例

后边会有一个综合测试的实例。

3.8 pthread_attr_getschedparam()

3.8.1 函数说明

在 linux 下可以使用 man pthread_attr_setschedparam命令查看该函数的帮助手册。

1
2
3
4
5
6
7
// Compile and link with -pthread.

/* 需包含的头文件 */
#include <pthread.h>

/* 函数声明 */
int pthread_attr_getschedparam(const pthread_attr_t *attr, struct sched_param *param);

【函数说明】该函数用于获取线程优先级到线程属性中(线程创建时使用)。

【函数参数】

  • attr: pthread_attr_t 类型指针变量,表示线程属性结构体地址。
  • param :struct sched_param 类型结构体指针变量,表示线程的优先级,它其实只有一个成员,就是sched_priority。
点击查看 struct sched_param 结构体成员
1
2
3
struct sched_param {
int sched_priority; /* Scheduling priority */
};

【返回值】 int 类型,成功返回0,失败返回一个错误值。

【使用格式】

1
2
3
4
5
6
7
8
9
/* 需要包含的头文件 */
#include <pthread.h>

/* 至少应该有的语句 */
pthread_attr_t attr;
pthread_attr_init(&attr);

struct sched_param param;
pthread_attr_getschedparam(&attr, &param);

【注意事项】 none

3.8.2 使用实例

后边会有一个综合测试的实例。

4. 优先级设置相关函数

4.1 sched_get_priority_max()

4.1.1 函数说明

在 linux 下可以使用 man sched_get_priority_max命令查看该函数的帮助手册。

1
2
3
4
5
/* 需包含的头文件 */
#include <sched.h>

/* 函数声明 */
int sched_get_priority_max(int policy);

【函数说明】该函数用于获取可用于策略识别的调度算法的最大优先级值。

【函数参数】

  • policy:int 类型变量,要获取最大优先级值的调度策略。支持的策略值有:SCHED_FIFO、SCHED_RR、SCHED_OTHER、SCHED_BATCH、SCHED_IDLE和SCHED_DEADLINE。

【返回值】 int 类型,成功返回对应调度策略的最大优先级值,失败返回-1,并设置错误号。

【使用格式】none

【注意事项】none

4.1.2 使用实例

后边会有一个综合测试的实例。

4.2 sched_get_priority_min()

4.2.1 函数说明

在 linux 下可以使用 man sched_get_priority_min命令查看该函数的帮助手册。

1
2
3
4
5
/* 需包含的头文件 */
#include <sched.h>

/* 函数声明 */
int sched_get_priority_min(int policy);

【函数说明】该函数用于获取可用于策略识别的调度算法的最小优先级值。

【函数参数】

  • policy:int 类型变量,要获取最小优先级值的调度策略。支持的策略值有:SCHED_FIFO、SCHED_RR、SCHED_OTHER、SCHED_BATCH、SCHED_IDLE和SCHED_DEADLINE。

【返回值】 int 类型,成功返回对应调度策略的最小优先级值,失败返回-1,并设置错误号。

【使用格式】none

【注意事项】none

4.2.2 使用实例

后边会有一个综合测试的实例。

4.3 pthread_setschedparam()

见上一小节的3.5。

4.4 pthread_getschedparam()

见上一小节的3.6。

4.5 pthread_attr_setschedparam()

见上一小节的3.7。

4.6 pthread_attr_getschedparam()

见上一小节的3.8。

5. CPU核心数

5.1 虚拟机设置

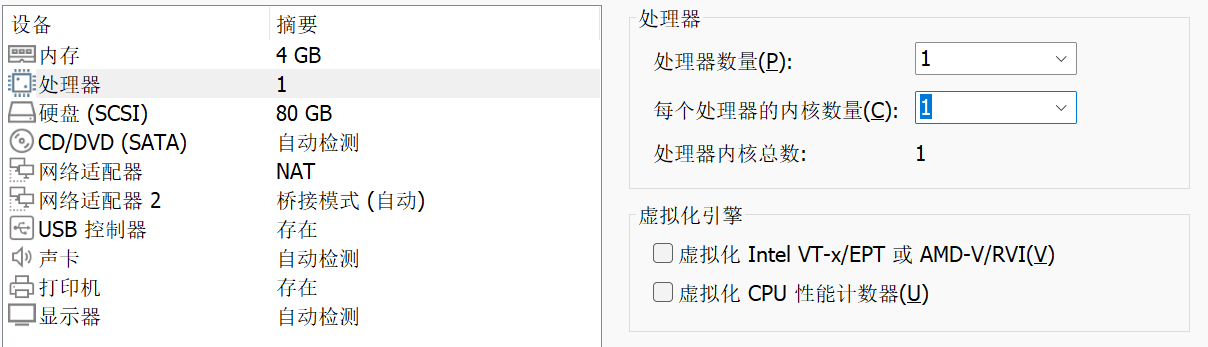
接下来就是验证一下前边的优先级,但是优先级的验证需要在单个CPU上跑线程,还是先来了解一下怎么查看CPU和操作CPU核的相关内容吧。

1
2
总核数 = 物理CPU个数 X 每颗物理CPU的核数
总逻辑CPU数 = 物理CPU个数 X 每颗物理CPU的核数 X 超线程数

我的下边这些操作都是在虚拟机中进行,我的虚拟机参数如下,这就相当于有2个物理CPU,每个CPU又有2个核心,一共就是有4个逻辑CPU:

image-20230305093805949

5.2 查看CPU的核心数

5.2.1 查看物理CPU个数

1
2
cat /proc/cpuinfo| grep "physical id"| sort| uniq| wc -l
cat /proc/cpuinfo | grep "physical id" | uniq

在终端输入以上命令可以看到:

1
2
3
4
5
6
hk@vm:/$ cat /proc/cpuinfo| grep "physical id"| sort| uniq| wc -l
2

hk@vm:/$ cat /proc/cpuinfo | grep "physical id" | uniq
physical id : 0
physical id : 1

5.2.2 查看逻辑CPU个数

1
2
cat /proc/cpuinfo| grep "processor"| wc -l
cat /proc/cpuinfo | grep "processor" | uniq

processor:指明每个物理CPU中逻辑处理器信息(序号:0~5表示有6个逻辑CPU)。在终端输入以上命令可以看到:

1
2
3
4
5
6
7
8
hk@vm:/$ cat /proc/cpuinfo| grep "processor"| wc -l
4

hk@vm:/$ cat /proc/cpuinfo | grep "processor" | uniq
processor : 0
processor : 1
processor : 2
processor : 3

5.2.3 查看单个CPU核数

1
cat /proc/cpuinfo | grep "cpu cores" | uniq

cpu cores:指明每颗物理CPU中总核数,在终端输入以上命令可以看到:

1
2
hk@vm:/$ cat /proc/cpuinfo | grep "cpu cores" | uniq
cpu cores : 2

5.2.4 直接查看CPU所有信息

1
cat /proc/cpuinfo

在终端输入以上命令可以看到:

1
太多了,这里就不写了

5.3 C语言获取CPU核心数

我们在程序中使用可以使用系统调用 sysconf 获取 cpu 核心数。

5.3.1 函数说明

1
2
3
4
5
6
7
8
9
10
11
12
13
/* 需要包含的头文件 */
#include <unistd.h>
// 返回系统可以使用的核数,但是其值会包括系统中禁用的核的数目,因 此该值并不代表当前系统中可用的核数
int sysconf(_SC_NPROCESSORS_CONF);
// 返回值真正的代表了系统当前可用的核数
int sysconf(_SC_NPROCESSORS_ONLN);

/* 以下两个函数与上述类似 */
#include <sys/sysinfo.h>

int get_nprocs_conf (void);/* 可用核数 */
int get_nprocs (void); /* 真正的反映了当前可用核数 */

5.3.2 使用实例

使用实例
1
2
3
4
5
6
7
8
9
10
11
12
13
14
15
16
17
#include <stdio.h>
#include <unistd.h>
#include <sys/sysinfo.h>

int main(int argc, const char *argv[])
{
int sc_nprocessor_conf = sysconf(_SC_NPROCESSORS_CONF);
int sc_nprocessor_onln = sysconf(_SC_NPROCESSORS_ONLN);
printf("sc_nprocessor_conf:%d\n", sc_nprocessor_conf);
printf("sc_nprocessor_onln:%d\n", sc_nprocessor_onln);

int nprocs_conf = get_nprocs_conf();
int nprocs_onln = get_nprocs();
printf("nprocs_conf:%d\n", nprocs_conf);
printf("nprocs_onln:%d\n", nprocs_onln);
return 0;
}

编译执行后如下所示:

1
2
3
4
sc_nprocessor_conf:4
sc_nprocessor_onln:4
nprocs_conf:4
nprocs_onln:4

6. 多进程和多线程在CPU核上的运行

每个 CPU 核运行一个进程的时候,由于每个进程的资源都独立,所以 CPU 核心之间切换的时候无需考虑上下文。每个 CPU 核运行一个线程的时候,有时不同线程之间需要共享资源,所以这些资源必须从 CPU 的一个核心被复制到另外一个核心,这会造成额外的开销。

6.1 taskset指令绑定

6.1.1 测试程序

点击查看测试程序

这里使用进程来进行测试。

1
2
3
4
5
6
7
8
9
10
11
12
13
14
15
16
17
#include <stdio.h>
#include <time.h>
#include <sys/types.h>
#include <unistd.h>

int main(int argc, const char *argv[])
{
pid_t ppid = getppid();
pid_t pid = getpid();

printf("ppid %d, pid %d\n", ppid, pid);
while (1)
{
sleep(5);
}
return 0;
}

使用以下命令编译程序:

1
gcc 02_cpu.c -Wall

我们就会得到一个a.out的可执行文件,我们需要在后台运行这个进程:

1
./a.out &

我们会得到以下输出:

1
2
3
hk@vm:~/6temp/test$ ./a.out &
[1] 82399
hk@vm:~/6temp/test$ ppid 70526, pid 82399

6.1.2 获取进程的PID

1
ps -aux | grep "a.out"

我们会得到以下输出信息:

1
2
3
hk@vm:~/6temp/test$ ps -aux | grep "a.out"
hk 82399 0.0 0.0 4352 732 pts/21 S 12:59 0:00 ./a.out
hk 82450 0.0 0.0 15984 924 pts/21 S+ 12:59 0:00 grep --color=auto a.out

6.1.3 查看进程当前运行在哪些CPU上

1
taskset -p 82399

我们会得到以下输出信息:

1
2
hk@vm:~/6temp/test$ taskset -p 82399
pid 82399's current affinity mask: f

显示为0x0f(十六进制) 转换为二进制为 1111(二进制),最右起第一个1表示CPU核心0,第二个1表示CPU核心1依次类推。所以进程运行在4个CPU上。

6.1.4 指定进程运行在CPU1和3上

1
taskset -pc 1,3 82399

我们可以看到以下输出:

1
2
3
4
5
hk@vm:~/6temp/test$ taskset -pc 1,3 82399
pid 82399's current affinity list: 2
pid 82399's new affinity list: 1,3
hk@vm:~/6temp/test$ taskset -p 82399
pid 82399's current affinity mask: a

0x0a转化为二进制就是0000 1010,就代表了CPU1和3。

6.1.5 运行程序时绑定CPU

1
taskset -c 3 ./a.out &

可以看到以下信息

1
2
3
4
5
6
hk@vm:~/6temp/test$ taskset -c 3 ./a.out &
[1] 82919
hk@vm:~/6temp/test$ ppid 70526, pid 82919

hk@vm:~/6temp/test$ taskset -p 82919
pid 82919's current affinity mask: 8

0x08转化为二进制就是0000 1000,可以看到进程就运行在了CPU3上了。

6.2 C语言中的绑定相关函数

CPU Affinity (CPU亲合力),CPU亲合力就是指在Linux系统中能够将一个或多个进程绑定到一个或多个处理器上运行。一个进程的CPU亲合力掩码决定了该进程将在哪个或哪几个CPU上运行。在一个多处理器系统中,设置CPU亲合力的掩码可能会获得更好的性能。

一个CPU的亲合力掩码用一个cpu_set_t结构体来表示一个CPU集合,下面的几个宏分别对这个掩码集进行操作:

1
2
3
4
5
void CPU_ZERO(cpu_set_t *set);          // 清空一个集合
void CPU_SET(int cpu, cpu_set_t *set); // 将一个给定的CPU号加到一个集合
void CPU_CLR(int cpu, cpu_set_t *set); // 将一个给定的CPU号从一个集合中去掉
int CPU_ISSET(int cpu, cpu_set_t *set);// 检查一个CPU号是否在这个集合中
int CPU_COUNT(cpu_set_t *set); // 返回集合中包含的CPU数量

cpu_set_t 是一个数据类型,具体是啥样的没在内核源码找到,后边找到了再补充吧,反正我们操作的时候都是定义这样一个变量,然后用宏去进行操作。

6.2.1 sched_setaffinity()

在 linux 下可以使用 man sched_setaffinity命令查看该函数的帮助手册。

1
2
3
4
5
6
7
8
/* 需包含的头文件 */
#define _GNU_SOURCE /* See feature_test_macros(7) */
// 实际使用的时候加下边的宏
#define __USE_GNU
#include <sched.h>

/* 函数声明 */
int sched_setaffinity(pid_t pid, size_t cpusetsize, const cpu_set_t *mask);

【函数说明】该函数用于设置进程号(线程)为pid的进程运行在mask所设定的CPU上。

【函数参数】

  • pid :pid_t类型变量,表示进程pid,如果pid的值为0,则表示指定的是当前进程
  • cpusetsize :size_t类型,是mask所指定的数的长度,通常设定为sizeof(cpu_set_t)。
  • mask :cpu_set_t 类型指针变量,CPU亲和力掩码,就是指定在哪几个 CPU 上运行。

【返回值】 int 类型,成功返回0,失败返回-1,并设置错误号。

【使用格式】none

【注意事项】按照查阅的资料来看,可以设定进程和线程,后边发现有什么问题再更新。

6.2.2 sched_getaffinity()

在 linux 下可以使用 man sched_getaffinity命令查看该函数的帮助手册。

1
2
3
4
5
6
7
8
/* 需包含的头文件 */
#define _GNU_SOURCE /* See feature_test_macros(7) */
// 实际使用的时候加下边的宏
#define __USE_GNU
#include <sched.h>

/* 函数声明 */
int sched_getaffinity(pid_t pid, size_t cpusetsize, cpu_set_t *mask);

【函数说明】该函数用于获取进程号(线程)为pid所指示的进程的CPU位掩码,并将该掩码返回到mask所指向的结构中。

【函数参数】

  • pid :pid_t类型变量,表示进程pid,如果pid的值为0,则表示指定的是当前进程
  • cpusetsize :size_t类型,是mask所指定的数的长度,通常设定为sizeof(cpu_set_t)。
  • mask :cpu_set_t 类型指针变量,CPU亲和力掩码,就是指在哪几个CPU上运行。

【返回值】 int 类型,成功返回0,失败返回-1,并设置错误号。

【使用格式】none

【注意事项】按照查阅的资料来看,可以设定进程和线程,后边发现有什么问题再更新。

6.2.3 pthread_setaffinity_np()

在 linux 下可以使用 man pthread_setaffinity_np命令查看该函数的帮助手册。

1
2
3
4
5
6
/* 需包含的头文件 */
#define _GNU_SOURCE /* See feature_test_macros(7) */
#include <pthread.h>

/* 函数声明 */
int sched_setaffinity(pid_t pid, size_t cpusetsize, const cpu_set_t *mask);

【函数说明】该函数用于设置线程为pid的进程运行在mask所设定的CPU上。

【函数参数】

  • pid :pid_t类型变量,表示线程pid,如果pid的值为0,则表示指定的是当前线程。
  • cpusetsize :size_t类型,是mask所指定的数的长度,通常设定为sizeof(cpu_set_t)。
  • mask :cpu_set_t 类型指针变量,CPU亲和力掩码,就是指定在哪几个 CPU 上运行。

【返回值】 int 类型,成功返回0,失败返回-1,并设置错误号。

【使用格式】none

【注意事项】none

6.2.4 pthread_getaffinity_np()

在 linux 下可以使用 man pthread_getaffinity_np命令查看该函数的帮助手册。

1
2
3
4
5
6
/* 需包含的头文件 */
#define _GNU_SOURCE /* See feature_test_macros(7) */
#include <pthread.h>

/* 函数声明 */
int sched_getaffinity(pid_t pid, size_t cpusetsize, cpu_set_t *mask);

【函数说明】该函数用于获取线程为pid所指示的进程的CPU位掩码,并将该掩码返回到mask所指向的结构中。

【函数参数】

  • pid :pid_t类型变量,表示线程 pid ,如果 pid 的值为0,则表示指定的是当前线程
  • cpusetsize :size_t类型,是mask所指定的数的长度,通常设定为 sizeof(cpu_set_t) 。
  • mask :cpu_set_t 类型指针变量,CPU亲和力掩码,就是指在哪几个 CPU 上运行。

【返回值】 int 类型,成功返回0,失败返回-1,并设置错误号。

【使用格式】none

【注意事项】none

6.3 绑定实例

6.3.1 使用实例1

点击查看详情
1
2
3
4
5
6
7
8
9
10
11
12
13
14
15
16
17
18
19
20
21
22
23
24
25
26
27
28
29
30
31
32
33
34
35
36
37
38
39
40
41
42
43
44
45
46
47
48
49
50
51
52
53
54
55
56
57
58
59
60
61
62
63
64
65
66
67
68
69
70
71
#include <stdlib.h>
#include <stdio.h>
#include <sys/types.h>
#include <sys/sysinfo.h>
#include <unistd.h>

#define __USE_GNU
#include <sched.h>
#include <ctype.h>
#include <string.h>
#include <pthread.h>

#define MAX_THREAD_NUM 200 // 1个CPU内的最多进程数

int cpu_cores_num = 0; // cpu中核数
void *thread_test(void *arg) // arg 传递线程标号(自己定义)
{
cpu_set_t mask; // CPU核的集合
cpu_set_t get_mask; // 获取在集合中的CPU
int *cpu_index = (int *)arg;

printf("the thread is:%d\n", *cpu_index); // 显示是第几个线程
CPU_ZERO(&mask); // 置空
CPU_SET(*cpu_index, &mask); // 设置亲和力值
if (sched_setaffinity(0, sizeof(mask), &mask) == -1) // 设置线程CPU亲和力
{
printf("warning: could not set CPU affinity, continuing...\n");
}

CPU_ZERO(&get_mask);
if (sched_getaffinity(0, sizeof(get_mask), &get_mask) == -1) // 获取线程CPU亲和力
{
printf("warning: cound not get thread affinity, continuing...\n");
}
for (int cpu_core_index = 0; cpu_core_index < cpu_cores_num; cpu_core_index++)
{
if (CPU_ISSET(cpu_core_index, &get_mask)) // 判断线程与哪个CPU有亲和力
{
printf("this thread %d is running processor : %d\n", cpu_core_index, cpu_core_index);
}
}

return NULL;
}

int main(int argc, char *argv[])
{
int tid[MAX_THREAD_NUM] = {0};
int cpu_core_index = 0;
pthread_t thread[MAX_THREAD_NUM];

cpu_cores_num = sysconf(_SC_NPROCESSORS_CONF); // 获取核数
if (cpu_cores_num > MAX_THREAD_NUM)
{
printf("cpu_cores_num of cores[%d] is bigger than MAX_THREAD_NUM[%d]!\n", cpu_cores_num, MAX_THREAD_NUM);
return -1;
}
printf("system has %i processor(s). \n", cpu_cores_num);

for (cpu_core_index = 0; cpu_core_index < cpu_cores_num; cpu_core_index++)
{
tid[cpu_core_index] = cpu_core_index; // 每个线程必须有个tid[i]
pthread_create(&thread[cpu_core_index], NULL, thread_test, (void *)&tid[cpu_core_index]);
}
for (cpu_core_index = 0; cpu_core_index < cpu_cores_num; cpu_core_index++)
{
pthread_join(thread[cpu_core_index], NULL); // 等待所有的线程结束,线程为死循环所以CTRL+C结束
}
return 0;
}

通过以下指令编译并运行:

1
2
gcc 02_cpu.c -Wall -lpthread
./a.out

然后可以看到以下输出信息:

1
2
3
4
5
6
7
8
9
10
11
hk@vm:~/6temp/test$ gcc 02_cpu.c -Wall -lpthread
hk@vm:~/6temp/test$ ./a.out
system has 4 processor(s).
the thread is:0
the thread is:3
this thread 0 is running processor : 0
the thread is:2
this thread 3 is running processor : 3
this thread 2 is running processor : 2
the thread is:1
this thread 1 is running processor : 1

6.3.2 使用实例2

点击查看详情
1
2
3
4
5
6
7
8
9
10
11
12
13
14
15
16
17
18
19
20
21
22
23
24
25
26
27
28
29
30
31
32
33
34
35
36
37
38
39
40
41
42
43
44
45
46
47
48
49
50
51
52
#define _GNU_SOURCE
#include <pthread.h>
#include <stdio.h>
#include <stdlib.h>
#include <errno.h>

#define handle_error_en(en, msg) \
do \
{ \
errno = en; \
perror(msg); \
exit(EXIT_FAILURE); \
} while (0)

int main(int argc, char *argv[])
{
int err, i;
cpu_set_t cpuset;

pthread_t thread = pthread_self();
/* Set affinity mask to include CPUs 0 to 7 */

CPU_ZERO(&cpuset);
for (i = 0; i < 8; i++)
{
CPU_SET(i, &cpuset);
}

err = pthread_setaffinity_np(thread, sizeof(cpu_set_t), &cpuset);
if (err != 0)
{
handle_error_en(err, "pthread_setaffinity_np");
}

/* Check the actual affinity mask assigned to the thread */
err = pthread_getaffinity_np(thread, sizeof(cpu_set_t), &cpuset);
if (err != 0)
{
handle_error_en(err, "pthread_getaffinity_np");
}
printf("Set returned by pthread_getaffinity_np() contained:\n");
for (i = 0; i < CPU_SETSIZE; i++)
{
if (CPU_ISSET(i, &cpuset))
printf("CPU %d\n", i);
}

exit(EXIT_SUCCESS);

return 0;
}

通过以下指令编译并运行:

1
2
gcc 02_cpu.c -Wall -lpthread
./a.out

然后可以看到以下输出信息:

1
2
3
4
5
Set returned by pthread_getaffinity_np() contained:
CPU 0
CPU 1
CPU 2
CPU 3

7. 优先级实例

7.1 修改linux的CPU核心数

优先级的效果需要在在单个核上才能看出,在这里为了方便测试,我直接将虚拟机的linux改掉,改为1核的,当然也可以用上边的那些函数将相关的线程绑定到同一个核上运行。

image-20230305140100387

  • 查看修改后的linux核情况
1
2
3
4
5
6
hk@vm:~/6temp/test$ cat /proc/cpuinfo| grep "processor"| wc -l
1
hk@vm:~/6temp/test$ cat /proc/cpuinfo | grep "cpu cores" | uniq
cpu cores : 1
hk@vm:~/6temp/test$ cat /proc/cpuinfo | grep "physical id" | uniq
physical id : 0

7.2 演示实例

点击查看详情
1
2
3
4
5
6
7
8
9
10
11
12
13
14
15
16
17
18
19
20
21
22
23
24
25
26
27
28
29
30
31
32
33
34
35
36
37
38
39
40
41
42
43
44
45
46
47
48
49
50
51
52
53
54
55
56
57
58
59
60
61
62
63
64
65
66
67
68
69
70
71
72
73
74
75
76
77
78
79
80
81
82
83
84
85
86
87
88
89
90
91
92
93
94
95
96
97
98
99
100
101
102
103
104
105
106
107
108
109
110
111
112
113
114
115
116
117
118
119
120
#include <stdio.h>
#include <pthread.h>
#include <errno.h>
#include <unistd.h>
#include <sched.h>


void *start_routine(void *arg)
{
int i, j;

while(1)
{
fprintf(stderr, "%c ", *(char *)arg);
for(i=0; i<100000; i++)
for(j=0; j<1000; j++);
}

pthread_exit(NULL);
}


int main(int argc, char *argv[])
{

pthread_t tid1, tid2, tid3;
pthread_attr_t attr1, attr2;
struct sched_param param1, param2;

/* 线程属性变量的初始化 */
pthread_attr_init(&attr1);
pthread_attr_init(&attr2);


/* 设置线程是否继承创建者的调度策略 PTHREAD_EXPLICIT_SCHED:不继承才能设置线程的调度策略*/
errno = pthread_attr_setinheritsched(&attr1, PTHREAD_EXPLICIT_SCHED);
if(errno != 0)
{
perror("setinherit failed\n");
return -1;
}

/* 设置线程是否继承创建者的调度策略 PTHREAD_EXPLICIT_SCHED:不继承才能设置线程的调度策略*/
errno = pthread_attr_setinheritsched(&attr2, PTHREAD_EXPLICIT_SCHED);
if(errno != 0)
{
perror("setinherit failed\n");
return -1;
}

/* 设置线程的调度策略:SCHED_FIFO:抢占性调度; SCHED_RR:轮寻式调度;SCHED_OTHER:非实时线程调度策略*/
errno = pthread_attr_setschedpolicy(&attr1, SCHED_RR);
if(errno != 0)
{
perror("setpolicy failed\n");
return -1;
}

errno = pthread_attr_setschedpolicy(&attr2, SCHED_RR);
if(errno != 0)
{
perror("setpolicy failed\n");
return -1;
}

//设置优先级的级别
param1.sched_priority = 1;
param2.sched_priority = 1;

//查看抢占性调度策略的最小跟最大静态优先级的值是多少
printf("min=%d, max=%d\n", sched_get_priority_min(SCHED_FIFO), sched_get_priority_max(SCHED_FIFO));


/* 设置线程静态优先级 */
errno = pthread_attr_setschedparam(&attr1, &param1);
if(errno != 0)
{
perror("setparam failed\n");
return -1;
}

errno = pthread_attr_setschedparam(&attr2, &param2);
if(errno != 0)
{
perror("setparam failed\n");
return -1;
}

/* 创建三个测试线程 */
/* 线程1,优先级1 */
errno = pthread_create(&tid1, &attr1, start_routine, (void *)"1");
if(errno != 0)
{
perror("create thread 1 failed\n");
return -1;
}
/* 线程2,优先级1 */
errno = pthread_create(&tid2, &attr2, start_routine, (void *)"2");
if(errno != 0)
{
perror("create thread 2 failed\n");
return -1;
}
/* 线程3,非实时线程,静态优先级0 */
errno = pthread_create(&tid3, NULL, start_routine, (void *)"3");
if(errno != 0)
{
perror("create thread 3 failed\n");
return -1;
}

pthread_join(tid1, NULL);
pthread_join(tid2, NULL);
pthread_join(tid3, NULL);

pthread_attr_destroy(&attr1);
pthread_attr_destroy(&attr2);

return 0;
}

我们编译并执行程序:

1
2
3
4
5
hk@vm:~/6temp/test$ gcc 02_cpu.c -Wall -lpthread
hk@vm:~/6temp/test$ ./a.out
min=1, max=99
create thread 1 failed
: Operation not permitted

可以看到我们没有权限修改优先级,必须要有管理员权限才可以。

1
hk@vm:~/6temp/test$ sudo ./a.out 
  • 设置优先级的两个线程均为 SCHED_FIFO时
1
2
3
4
hk@vm:~/6temp/test$ gcc 02_cpu.c -Wall -lpthread
hk@vm:~/6temp/test$ sudo ./a.out
min=1, max=99
1 1 1 1 1 1 1 1 1 1 1 1 1 1 1 1 1 1 1 1 1 1 1 3 1 1 1 1 1 1 1 1 1 1 1 1 1 1 1 1 1 1 1 1 1 3 1 1 1 1 1 1 1 1 1 1 1 1 1 1 1 1 1 1 1 1 1 1 1 3 1 1 1 1 1 1 1 1 1 1 1 1 1 1 1 1 1 1 1 1 1 1 3 1 1 1 1 1 1 1 1 1 1 1 1 1 1 1 1 1 1 1 1 1 1 3 1 1 1 1 1 1 1 1 1 1 1 1 1 1 1 1 1 1 1 1 1 1 3 1 1 1 1 1 1 1 1 1 1 1 1 1 1 1 1 1 1 1 1 1 1 3 1 1 1 1 1 1 1 1 1 1 1 1 1 1 1 1 1 1 1 1 1 1 3 1 1 1 1 1 1 1 1 1 1 1 1 1 1 1 1 1 1 1 1 1 1 1 1 1 1 1 1 1 1 1 1 1 1 1 1 1 1 1 1 1 1 1 1 ^C

会发现线程2根本就没有执行过,这是因为它俩优先级一样,但是线程1先被创建,先运行,一旦运行就会一直抢占资源,线程2优先级又和线程1一样,这样就导致线程2根本没有执行过。同时会发现,即便线程3是非实时线程,也会得到执行的机会,虽然很少。

  • 设置优先级的两个线程均为 SCHED_RR时
1
2
3
4
hk@vm:~/6temp/test$ gcc 02_cpu.c -Wall -lpthread
hk@vm:~/6temp/test$ sudo ./a.out
min=1, max=99
1 1 1 1 1 1 1 1 1 1 1 1 1 1 1 1 1 1 1 1 1 1 1 1 1 1 1 1 1 1 1 1 1 1 1 1 1 1 1 1 1 3 1 2 2 2 1 1 2 2 1 1 1 2 2 1 1 2 2 2 1 1 2 2 3 1 1 1 2 2 1 1 2 2 2 1 1 2 2 1 1 1 2 2 1 1 2 3 2 2 1 1 2 2 1 1 1 2 2 1 1 2 2 1 1 2 2 2 1 1 3 1 2 2 1 1 2 2 1 1 2 2 2 1 1 1 2 2 1 1 2 2 1 3 1 2 2 2 1 1 1 2 2 1 1 2 2 1 1 2 2 2 1 1 2 2 1 1 1 2 2 1 1 2 2 2 1 1 2 2 1 1 1 2 2 1 1 2 3 2 2 1 1 2 2 1 1 1 2 2 1 1 2 2 2 1 1 2 2 1 1 ^C

会发现,当线程2开始执行后,基本就是线程1和2执行次数相当,线程3也会执行,但是也会很少,这就是线程的优先级问题。